1. Introduction — Why iPhone finance features matter
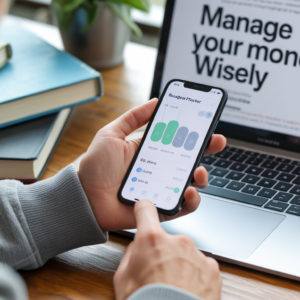
Phones used to be for phone calls. Now they are tiny banks, wallets, carts, and sometimes therapists (when the battery is low and you panic). For U.S. customers, the iPhone has turned into a central place to pay, borrow, stash, track, and plan. Apple’s finance toolbox—Wallet, Apple Pay, Apple Cash, Apple Card, and newer features like Pay Later—aims to make money stuff feel less scary and more convenient.
This guide walks you through these features in plain English. No finance-speak overcomplications — just practical steps, tips, and a few jokes so you don’t fall asleep halfway through.
2. Quick roadmap: What this guide covers
Short version: by the time you finish reading, you will know how to set up Wallet and Apple Pay, decide whether Apple Card or Apple Pay Later makes sense for you, safely use Apple Cash, and manage finances using the iPhone’s built-in tools. You’ll also get troubleshooting steps and guidance about who to contact if something goes wrong.
Long version: the rest of this guide is the long version. Grab coffee.
3. Apple Wallet: The digital hub on your iPhone
What Wallet holds
Think of Wallet as a neat, digital little folder in your pocket that lives on your iPhone. It can store:
- Credit and debit cards (virtual versions)
- Apple Card (if you have it)
- Transit cards for supported systems
- Boarding passes and event tickets
- Rewards cards and store passes
- Keys (car, home) if supported
- Eligible driver’s licenses or state IDs (in supported states)
- Apple Cash card
- Buy-now-pay-later or installment cards when supported by providers
So yes — Wallet tries to replace the paper mess in your wallet. It doesn’t always succeed (you will still find random receipts for a sandwich from 2019), but it’s close.
Setting up Wallet step-by-step
- Open the Wallet app on your iPhone. (It’s installed by default.)
- Tap the + button at the top right.
- Choose the type of card or pass you want to add (credit card, debit card, transit card, etc.).
- Follow the on-screen instructions: scan the card or enter details manually.
- Your bank may ask for extra verification (a code via SMS, a phone call, or app verification).
- After verification, your card appears in Wallet and you can use Apple Pay with it.
A few setup tips:
- Make sure your iPhone software is up to date — some Wallet features need the latest iOS.
- Use Face ID or Touch ID for quick, secure access.
- For family accounts, check the Family Sharing and Wallet settings for parental controls.
Everyday use cases
- Tap to pay at stores that accept contactless payments.
- Show your boarding pass at the airport.
- Use transit cards to tap into buses or trains in supported regions.
- Carry your digital ID in places that accept it (some airports and a growing number of state services).
Pro tip: double-press the side button to quickly bring up the default card when you’re at a register. It’s like a magic trick, but with less applause.
4. Apple Pay: Tap, pay, done (but read this first)
How Apple Pay works
Apple Pay is a contactless payment method that uses the Wallet on your iPhone. It doesn’t actually send your real card number to the merchant. Instead, Apple uses a thing called tokenization: your actual card data is replaced with a digital token that represents your card. That token is what gets sent when you pay — which helps protect your real card number.
On the iPhone, payments are authenticated with Face ID, Touch ID, or your passcode, so even if someone borrows your phone, they still should not be able to pay in your name.
Where to use it
- Physical stores that accept contactless payments (look for the contactless symbol)
- In apps and online checkouts when you see the Apple Pay button
- Transit systems that support contactless payments
- Peer-to-peer transfers via Apple Cash (when sending/receiving in Messages)
Setting up Apple Pay
If you added a card to Wallet, Apple Pay is mostly ready. To double-check:
- Open Settings → Wallet & Apple Pay.
- Confirm your default card and shipping/billing addresses.
- Turn on features like “Double-Click Side Button” for quick access.
Common troubleshooting
If Apple Pay isn’t working:
- Check your iPhone’s NFC is enabled (NFC is automatic on recent iPhones).
- Make sure the merchant accepts contactless payments.
- Verify the card hasn’t expired or been blocked by your bank.
- Restart your iPhone and try again.
If issues persist, check your bank’s app or call their support — sometimes banks block new devices for security reasons until you confirm the activity.
5. Apple Pay Later & Buy-Now-Pay-Later options
What Apple Pay Later is (and isn’t)
Apple Pay Later is Apple’s built-in installment option that allows qualifying users to split eligible purchases into smaller payments. At launch, Apple offered a simple plan to split a purchase into four interest-free payments over six weeks directly inside Wallet. Over time, Wallet has expanded to show more “pay later” options and integrate third-party BNPL providers.
Important: Apple Pay Later is not a free-for-all loan service. It’s meant for short-term financing on supported purchases and often integrates third-party installment providers or bank partners.
How to use Pay Later at checkout
- At checkout, choose Apple Pay.
- If the merchant and your card/provider support Pay Later, you’ll see one or more installment options.
- Select the plan you prefer and confirm within Wallet.
- Track and repay the installment in Wallet — Apple shows your repayment schedule and remaining balance.
Pros and cons
Pros:
- Friendly for short-term cash flow; small payments instead of one large charge.
- Many basic Apple Pay Later options are interest-free if you qualify.
- Built-in into Wallet, so it’s easy to track.
Cons / Cautionary notes:
- Missed payments may incur late fees with third-party providers or affect other financial arrangements.
- Using BNPL too often can add up and cause budgeting problems.
- Some BNPL providers perform soft or hard credit checks — know this before you apply.
Short story: Pay Later is handy for planned purchases but don’t use it like a credit card with no plan. You’ll thank yourself later.
6. Apple Card: The shiny titanium partner
Apple Card is Apple’s credit card, integrated tightly with Wallet and Apple Pay. It aims to be simple, transparent, and to offer immediate cash-back rewards called Daily Cash.
Applying for Apple Card
Applying is simple and happens inside Wallet. Apple will run a credit check (and often it’s a soft inquiry to start — but final approval may involve a hard pull). The card is issued by a bank partner and comes with a virtual card immediately, followed by an optional physical titanium card in the mail.
A few application tips:
- Make sure your device has the latest iOS.
- Be prepared to verify your identity (ID, address, etc.).
- If you have an existing Apple ID billing address, use that for consistency.
Note: Apple Card is issued by a bank partner in the US; the bank that issues the Apple Card manages underwriting and customer service for many account issues.
Daily Cash explained
Daily Cash is Apple Card’s cashback program. Instead of waiting for a monthly statement, you get a percentage of your purchases back — and it posts quickly to your Apple Cash balance or your Apple Card savings (if you enabled the savings option).
Typical Daily Cash rates (common examples):
- 3% Daily Cash on Apple purchases and select partners when you use Apple Card with Apple Pay
- 2% Daily Cash when you use Apple Card with Apple Pay anywhere else
- 1% Daily Cash on purchases made with the physical titanium card
Daily Cash is flexible: you can spend it, transfer it to a bank, or stash it in a savings account if you choose.
Interest, fees, and how payments work
Apple Card advertises no fees for many everyday problems — no annual fee, no late fees (though interest may still accrue depending on your balance), and no foreign transaction fees in many cases. However, interest on carried balances still applies — the APR depends on your creditworthiness.
Paying your bill:
- Use Wallet to see balances, scheduled payments, and estimated interest.
- Set up automatic payments if you want a hands-off approach.
- Apple shows different payment options (minimum payment